· Marcus Reed
DIY Bike Frame Bag: What Making Your Own Actually Takes
Make Your Own Gear is a real corner of cycling, and frame bags are one of the projects people reach for first. The shape looks simple: a flat triangle, a zip, three straps. Then you hold cardboard up to your own bike and discover the triangle is not a triangle. Here is what a home build involves, so you decide before you cut fabric rather than after.
What you are actually building
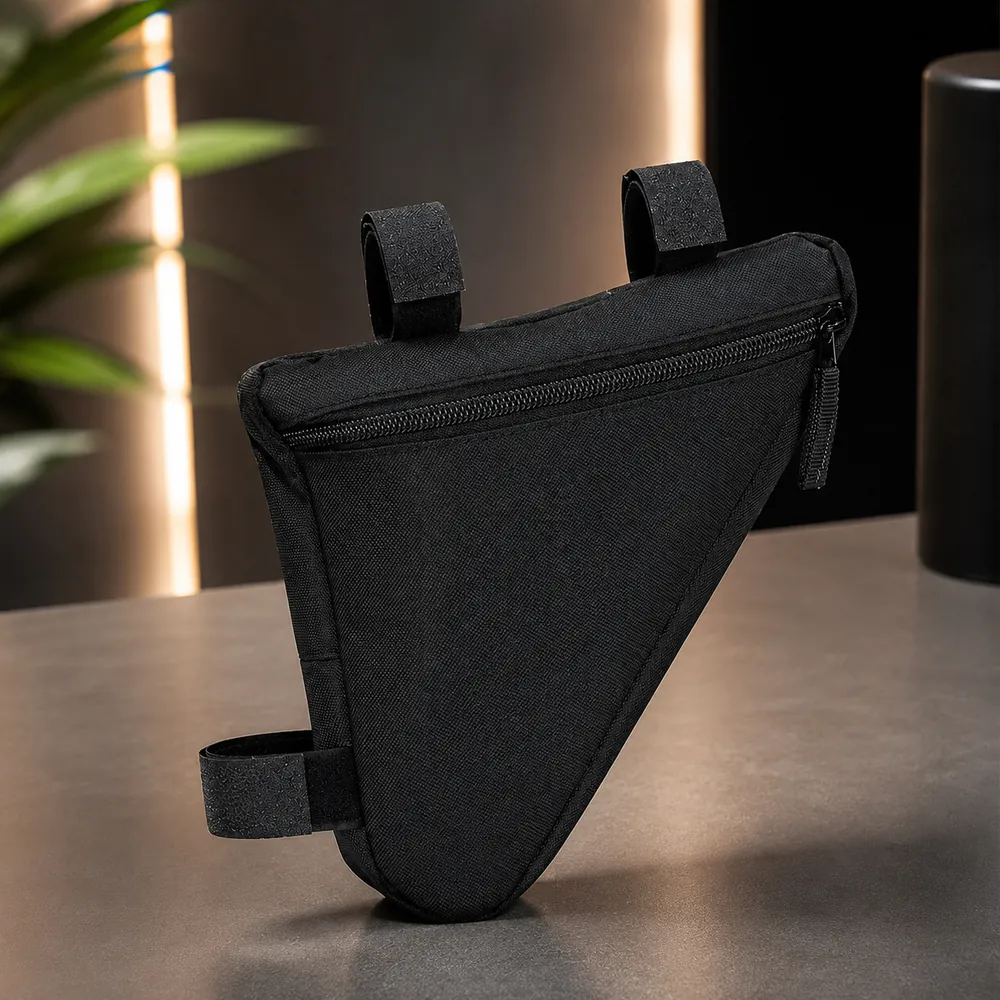
Look at a finished bag off the bike and the construction reads clearly. The side panels carry the outline of your frame opening. Between them runs a strip of fabric — the gusset — and its width is the only thing setting how much the bag holds. The zip does not sit on the flat face where it would be easy to sew: it follows the curve of the top tube, because that is the edge you can reach while the bag is mounted.
That gusset is where most first-timers make their one irreversible decision. Too narrow and the bag is a document wallet. Too wide and it fouls your knees on every pedal stroke, which no amount of tightening will fix. The width is not a style choice: it is a clearance measurement off your own bike, and it is the number to settle first.
Compact bags take a deliberate shortcut here. Instead of filling the whole opening they occupy the front corner near the head tube, the part of the triangle that survives on every frame size. That is the geometry behind our half frame bag shape, and it asks far less of your measurements than a full-triangle build.
The materials list is longer than the tutorials admit
Write the list out before you shop, because the surprise is not the price of any one item, it is the shape of the total. Coated ripstop for the panels. Something more abrasion-resistant for the face pressing against the frame, since that surface rubs paint for every mile. A coil zip long enough to run a curve. Binding, webbing, hook-and-loop, bonded polyester thread, and thin closed-cell foam so the panels hold their shape when the bag is half empty.
Now the arithmetic that matters. A frame bag consumes a small rectangle of fabric, but fabric is sold by the half-yard, binding by the reel, hook-and-loop by the card, thread by the spool. On a first build you pay for all of it and use a fraction of each, so the total is dominated by the minimums rather than by the bag. From the second bag the cupboard is stocked and the marginal cost collapses — which is why people who make one usually make four.
The pattern is the hard part, and it fits one bike
Every experienced builder converges on the same method: cut cardboard bigger than the opening, wedge it into the triangle, and trace the inside line of the tubes. What you get is not a triangle. Modern frames slope the top tube for standover height, the tubes are shaped rather than round, and the corners are radiused. That outline is already wrong in three places.
Then you trim. Back off the lower edge until a full bottle clears the cage. Back off the rear corner until it sits ahead of where your knee passes, which you can only check by sitting on the bike and turning the cranks. Back off wherever a cable crosses. Only then add seam allowance and cut fabric. Our sizing guide covers those clearances — work through it before the scissors come out.
What people underestimate is how narrowly the pattern belongs to one bike. It is drawn from your tube lengths, your cage position, your cable routing. Put it on a second bike and the outline is close but the strap positions are not — and strap position is what stops rattle. A bought bag sidesteps this by strapping to a short clear run of tube, which is why it moves between bikes. Our guide to small and step-through frames covers where the geometry runs out.
What your sewing machine has to get through
Count the layers at a bound seam and you are usually looking at four before the binding wraps over, which makes six under the foot. Add webbing at a strap point and it climbs again. A domestic machine copes, but not on the settings it came with: a heavier needle so it does not deflect, a longer stitch so the fabric is not perforated into a tear line, and a walking foot, because coated cloth grips the bed and slides against itself in a way cotton never does.
The rule that catches everyone once is that you cannot unpick and re-sew in the same place. In dressmaking a wrong seam is a small setback. In coated fabric the holes stay after the thread is gone, so a second line either sits beside the first or runs through ready-made perforations. Builders learn to baste with clips, check the fit against the frame, and only then commit.
Americans ride a bicycle each year, across every frame size and style
— Outdoor Industry Association, 2023
US bike sales hit record highs during the 2020 cycling boom
— NPD Group, 2021
E-bikes are among the fastest-growing US cycling categories, outselling electric cars in unit sales
— LEVA, 2023
The corners are the last machine problem. Where the gusset turns through a tight radius every layer converges at once, and that is also where a full bag takes the load. Slow down and go round twice.
The zip is where most first builds come apart
Sewing a zip into a straight seam is a beginner exercise. Sewing one along the top edge of a frame bag is not, because that edge follows the top tube: the tape wants to lie flat while the fabric wants to curve. A coil zip flexes where a moulded-tooth zip fights you, but it still needs easing — clip the tape along the whole curve, spread the excess before a single stitch, and sew with the tape uppermost so you can watch it feed.
Then weather. Every seam is a line of holes and a zip is a deliberate gap, so a home build usually lets spray in along the zip line first and the lower seams second. Binding helps and a flap over the zip helps more. Our waterproofing page sets out where water resistance ends. The Ridgeline Trail is cut from a lightweight, water-resistant Oxford/nylon that handles spray and light rain, which is why riders who need a phone perfectly dry pair it with the Ridgeline Pilot and its hard waterproof shell.
Straps decide whether the bag rattles
This is what separates a bag that lasts a season from one that lasts. Webbing sewn onto the surface of a panel puts the whole load on a patch of stitching with only fabric behind it, and repeated impacts work that stitching out. Caught into the seam where panel, gusset and binding already meet, it pulls against the entire structure instead. Both look nearly identical from outside, which is why the mistake survives the first few rides.
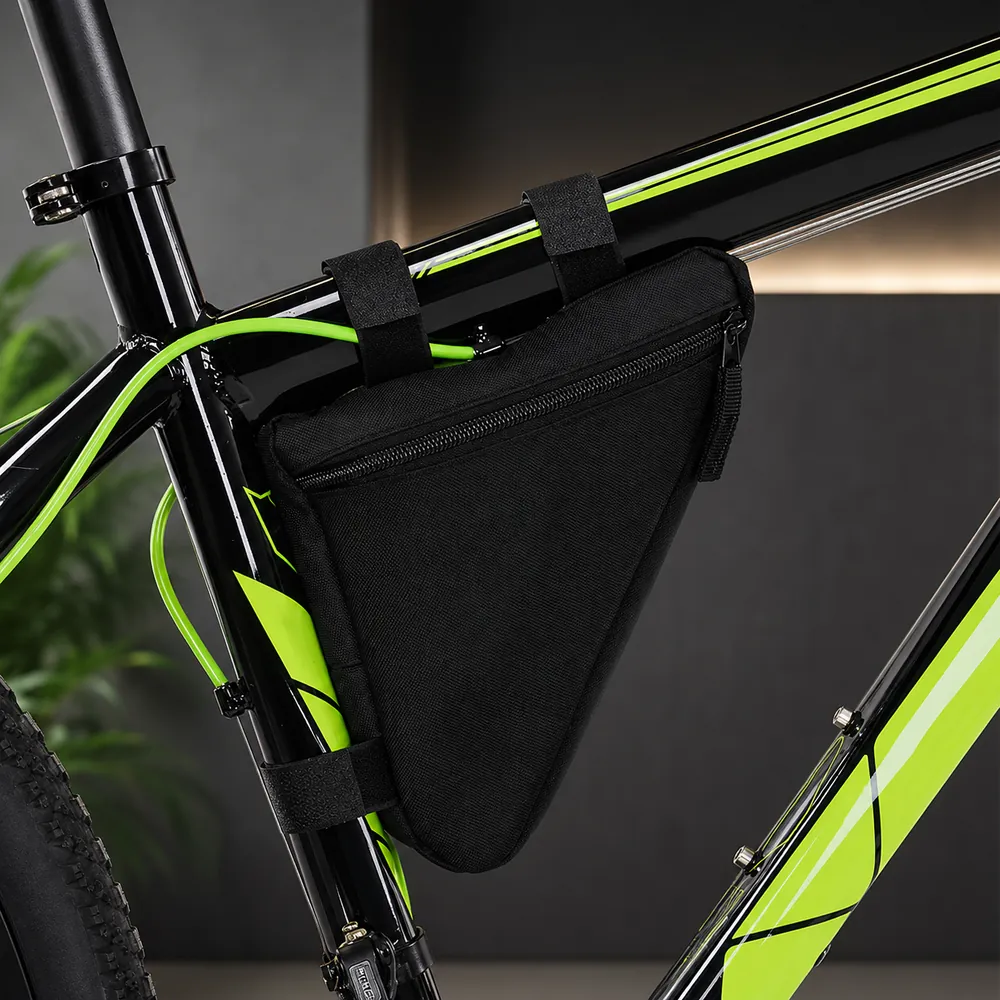
Placement is the other half. The Ridgeline Trail holds on with three hook-and-loop straps, two around the top tube and one around the down tube, each needing a short clear run of bare tube. On a home build you choose those positions — an advantage — but you choose them against cable stops, bottle bosses and the seat clamp, and they have to be symmetrical enough that the bag pulls flush rather than twisting. Our install guide covers the tightening order.
Test it with a drop: load the bag, lift the bike a hand's width off the ground and drop it. Silence means the straps are right. A knock means one strap is doing less work than the other two.
Where making your own genuinely wins
There are riders for whom sewing one is straightforwardly the right call, and they are easy to name. If your frame is unusual — a tandem, a recumbent, a fat bike with a cavernous opening, a custom build with tubes in the wrong places — a pattern taken off your own bike solves what no standard shape will. If you want every last inch of a big triangle, a bag drafted to your outline carries more than a compact one can, which is the logic behind a full frame bag. And if you want a particular fabric, colour or divider, you can simply have it.
There is also the plain pleasure of the thing. Plenty of riders sew a frame bag because they want to have sewn one, and the bag on the bike afterward carries something a bought one does not. That is a good reason and it needs no defending — only a clear picture of the work.
When to put a bag on the bike instead
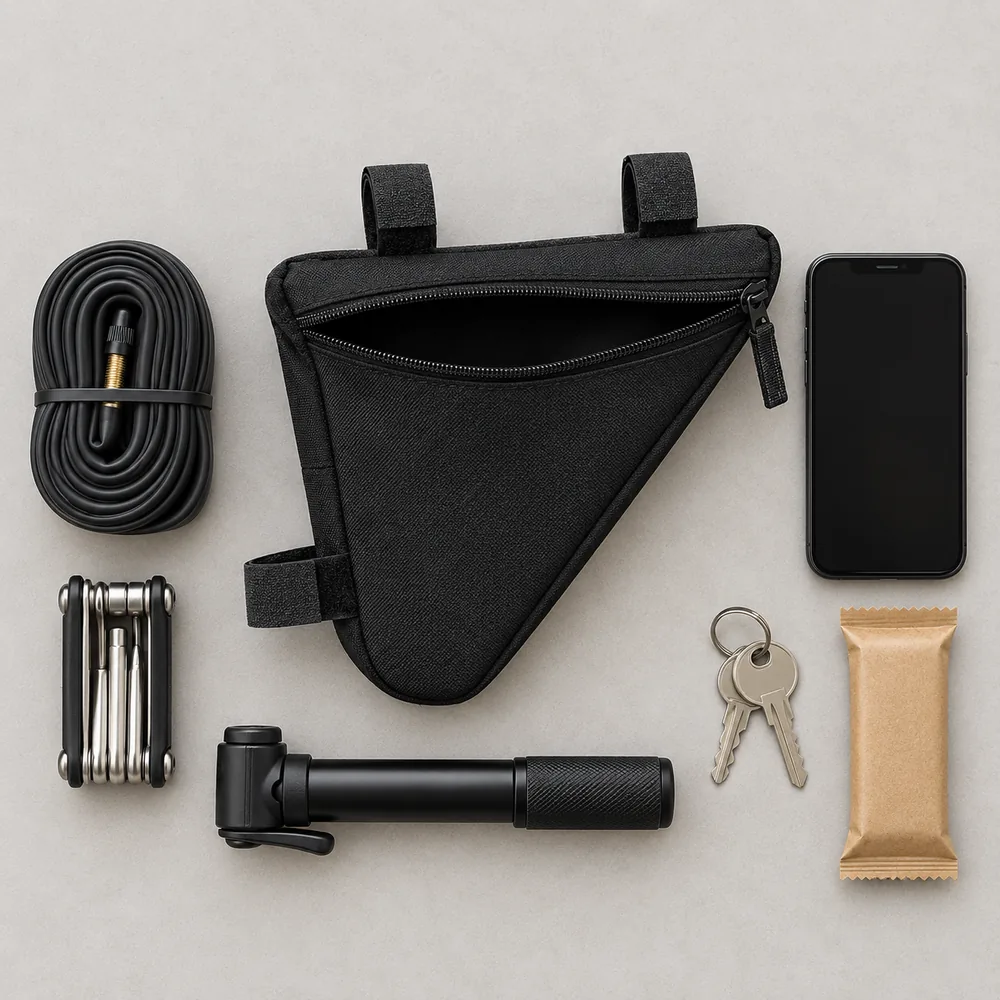
Most triangles are ordinary, and an ordinary triangle is already solved. A compact bag sits in the front corner, holds a tube, multitool, pump, snacks, phone and keys low and centred, and asks nothing but three straps pulled tight. With two bikes in the garage, it also is not drafted around tube lengths you are about to replace.
Where a home build usually gives out. The pattern is rarely the problem — people measure carefully when they are about to cut. The strap seams and the zip line are, in that order, and both show up on rough ground rather than in the workshop.
The Ridgeline Trail triangle bag is the bought version of everything above: shaped panels that sit flush in the front corner, a full-length coil zip, bound seams, and three hook-and-loop straps caught into the structure. One verified buyer put the result plainly: "Excellent quality! Sits snug in the frame and doesn't rattle on rough ground."
The compact Ridgeline Trail is $29.95 (was $39.95), comes in black, black/red and black/blue, ships free, arrives in 6 to 10 business days and carries a 30-day money-back guarantee. Fit it to your own bike, run the drop test, and see how it sits.
Free worldwide shipping · arrives in 6 to 10 business days · 30-day money-back guarantee · secure Stripe checkout. Want the phone bag too? The Complete Kit pairs both for $44.95.
DIY frame bag FAQ
Can you make a bike frame bag without a sewing machine?
You can hand-stitch a small one, but the seams holding the straps decide whether the bag stays on the bike, and they pass through several layers of coated fabric plus webbing. Hand stitching that stack is slow and hard to keep even, so most no-sew versions hang rather than sit flush in the triangle.
What fabric should I use for a DIY bike frame bag?
A coated or laminated ripstop for the outer panels, and something tougher on the face that touches the frame, because that side takes the rub. Skip uncoated cotton canvas: it soaks up road spray and stays heavy. Buy thread to match, since outdoor-rated bonded polyester holds a load that all-purpose thread lets go.
How do I make a pattern for my bike triangle?
Cut cardboard larger than the opening, hold it in the triangle and trace the inside of the tubes, then trim it back until it clears the bottle cage, your knees and the cables. Add seam allowance all round. Our frame bag sizing guide covers the clearances that set the shape before you cut fabric.
Does a home-made frame bag keep the rain out?
Partly. Every stitch line is a row of holes and a zip is an opening by design, so water finds the seams and the zip line first. Bound seams and a flap over the zip take most of it. The Ridgeline Trail is cut from a water-resistant Oxford/nylon that shrugs off spray and light rain.
Is making a frame bag cheaper than buying one?
On a first build the total is driven by minimum quantities rather than the fabric you use: a half-yard cut when you need a fraction, a reel of binding, a card of hook-and-loop, a spool of thread. From the second bag most of that is already in the cupboard. The Ridgeline Trail is $29.95 with free shipping.

Marcus Reed · Gear Editor at Ridgeline
Marcus writes Ridgeline's guides to frame bags, bikepacking setups and carrying gear on the bike.
Next: measure up with the sizing guide, see what goes in with what to pack, read verified customer reviews, or browse the Ridgeline guides.